How It Works
From first call to finished room — here’s exactly what happens on a WallBeGone project.
Most homeowners have never done this before. They don’t know what to expect, what questions to ask, or whether they’re getting a straight answer from a contractor.
This page is our answer to that. Here’s exactly how a WallBeGone project runs — every step.
The Process
Step 1 — Free Site Visit
Call, text, or fill out the contact form. We come out to the home at no charge. We look at the wall, what’s above it and below it, measure the span, and check the footing situation. Based on what we can see, we give you a ballpark estimate and walk you through what the process looks like. No charge, no obligation.
Step 2 — Sometimes We Recommend Exploratory Demo
If you want to move forward, and we know we need an engineer, we recommend demo. We need to see what’s actually in there — framing, load path, what’s in the ceiling and floor above. This is how we eliminate surprises. If we can see what we need to see without demo, that’s great. An unfinished basement below, and attic access above will let us see what we need to see. Exploratory demo is a fixed fee.
This step protects you. Engineers design from real information, not assumptions — and real information is cheaper to work with.
Step 3 — Engineering Site Visit
With field conditions confirmed, we coordinate a licensed structural engineer to visit the site. You’ll be invoiced for their site visit fee plus our coordination markup. We handle the scheduling and the communication — you don’t have to stress over it.
Step 4 — Structural Design
The engineer produces the stamped structural design specifying the beam, bearing points, post requirements, and footing conditions. You’ll be invoiced for the design fee plus coordination markup when it’s complete.
Once the design fee is paid, those drawings are yours. You can take them to any licensed contractor you choose. We’ll provide our install price — proceeding with us is your call.
Step 5 — Firm Install Price
With the stamped design and confirmed field conditions in hand, we give you a firm, written install price. This is the real number — not an estimate. It covers structural scope: shoring, demo, beam installation, and inspection. Finish work is priced separately and is optional. Rerouting electrical, plumbing, and HVAC are not included, but we will help coordinate those if they are an obstacle.
Step 6 — Permit
We submit to the local Authority Having Jurisdiction — City of Spokane, Spokane Valley, or wherever your project is located. We track it and keep you updated. Timelines vary by jurisdiction.
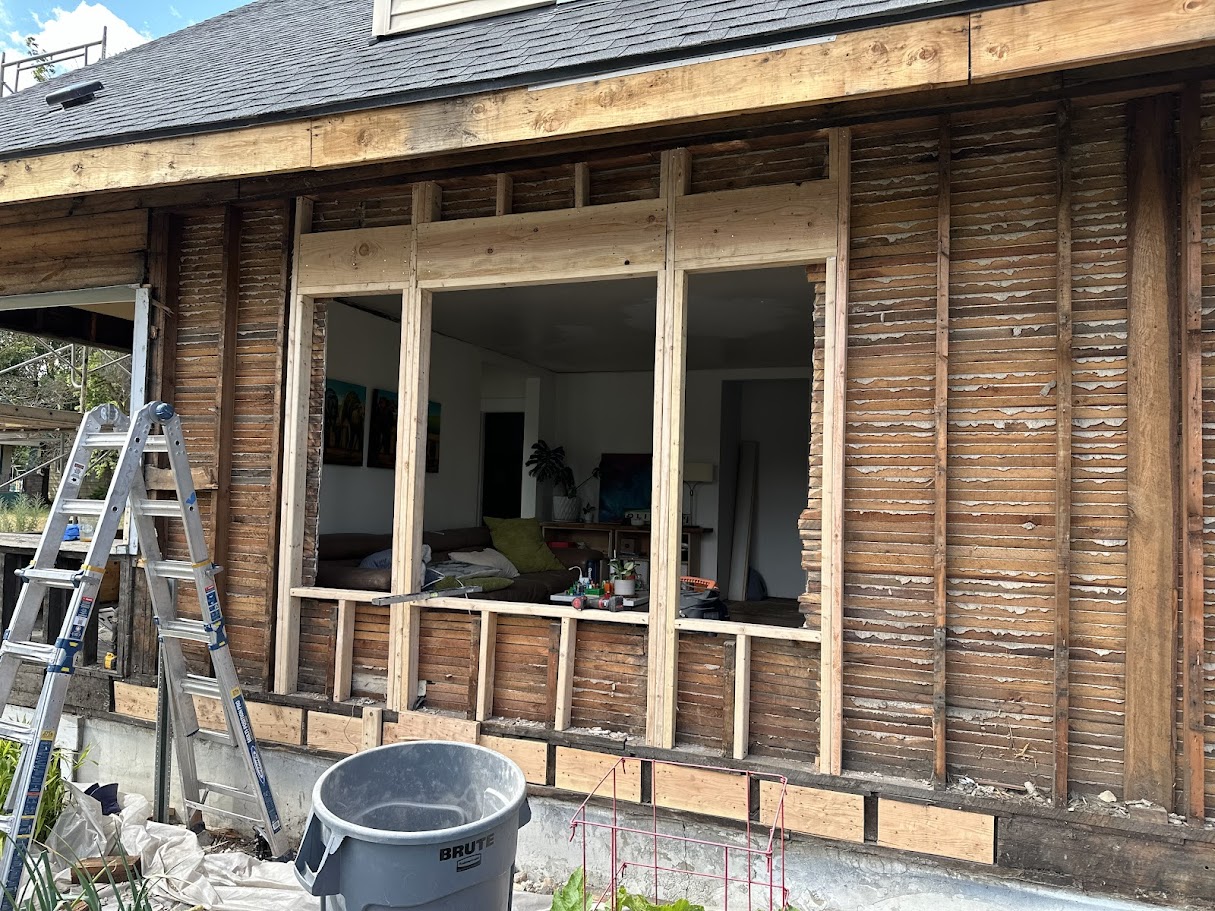
Step 7 — Build
We shore the structure, complete the wall removal, install the beam, and do whatever finish scope is in the contract. The job is documented and photographed throughout.
Step 8 — Inspection and Close
The local inspector signs off on the structural work. We do a final walkthrough with you. You get photos and documentation for your records.
What Makes Us Different
Most homeowners who call us have already tried to get this done. They’ve called general contractors who said no, got quotes that disappeared, or were told it would cost twice what they expected.
WallBeGone is built specifically for this work. We have an established relationship with licensed structural engineers, a clean permit submission process, and a shoring and install protocol we’ve run multiple times.
It’s not complicated — it just requires a contractor who’s done it before.
Ready to get started?
Reach out with your wall situation. We’ll take it from there.